Learn Django in 14 days: Day 1 - Getting Started with Django
By JoeVu, at: June 12, 2023, 11:14 a.m.
Estimated Reading Time: __READING_TIME__ minutes
Introduction to Django
Django is a powerful web framework written in Python that simplifies and accelerates the development of web applications. It follows the batteries-included philosophy, providing a comprehensive set of tools and libraries to streamline the web development process. With its scalability and robustness, Django has gained immense popularity among developers.
Our demo application is book-store management. You can find the source code here
Installing Python and pip
Before diving deeply, we must ensure that Python and pip (Python package manager) are properly installed on your system. While Python is the programming language on which Django is built, and pip is used to install Django and other Python packages effortlessly. Here are the steps to install Python and pip:
- Visit the official Python website (https://www.python.org/downloads/) and download the latest version of Python appropriate for your operating system. The recommended version is 3.10
- Run the downloaded installer and follow the installation instructions.
- Open a command-line interface and verify that Python is successfully installed by typing
python --version. You should see the installed Python version displayed. - Next, check if
pipis installed by running the commandpip --version. If pip is not found, you can install it by following the instructions on the official pip documentation.
Beside, follow our blog post to install local development.
Setting up the Development Environment
To work effectively with Django, it's essential to set up a suitable development environment. Here are the key components you'll need:
-
Text Editor: Choose a text editor or an integrated development environment (IDE) that suits your preferences. Some popular choices among developers are Visual Studio Code, Sublime Text, and PyCharm. These editors offer features like code highlighting, autocompletion, and easy project management.
-
Command-line Interface: You'll need a command-line interface (CLI) to execute Python and Django commands. On Windows, you can use the Command Prompt or PowerShell. On Mac and Linux, the Terminal or iTerm are commonly used. Make sure your CLI is properly configured and accessible from any location.
Check our blog post for more details
Installing and Using virtualenv
Virtual environments are a crucial tool in Python development, allowing you to create isolated environments with their own set of Python packages. This ensures project dependencies remain separate and avoids conflicts between different projects. Here's how you can install and use virtualenv:
- Install virtualenv by running the command
pip install virtualenv. - Create a new virtual environment for your Django project by running
virtualenv venv. Replace "venv" with the desired name for your environment. - Activate the virtual environment using the appropriate command for your operating system:
- On Windows:
venv\Scripts\activate - On Mac/Linux:
source venv/bin/activate
- On Windows:
- Once activated, your command-line interface will indicate that you are working within the virtual environment.
- Install Django within the virtual environment by running
pip install django. This ensures that Django is installed only within the project's isolated environment. - For better management, we can create a file named
requirements.txtto store all required packages for a web application
Check our blog post for more details
Creating a Django Project
With Python, pip, and virtualenv set up, you are now ready to create your first Django project. Follow these steps to get started:
- Setup a root directory for the web application
- Open your command-line interface and navigate to the chosen location using the
cdcommand. - Create a new Django project by running
django-admin startproject bookstore. Replace "bookstore" with the desired name for your project. - After the command completes, you'll have a new directory named "bookstore" (or your chosen project name) containing the initial Django project structure.
Running the Development Server
To test your Django project locally, you need to run the development server. The development server allows you to preview your application in a web browser. Follow these steps to start the server:
- Navigate to your project's root directory (
bookstore) using the command-line interface. - Run the command
python manage.py migrateto make sure we create all needed tables - Run the command
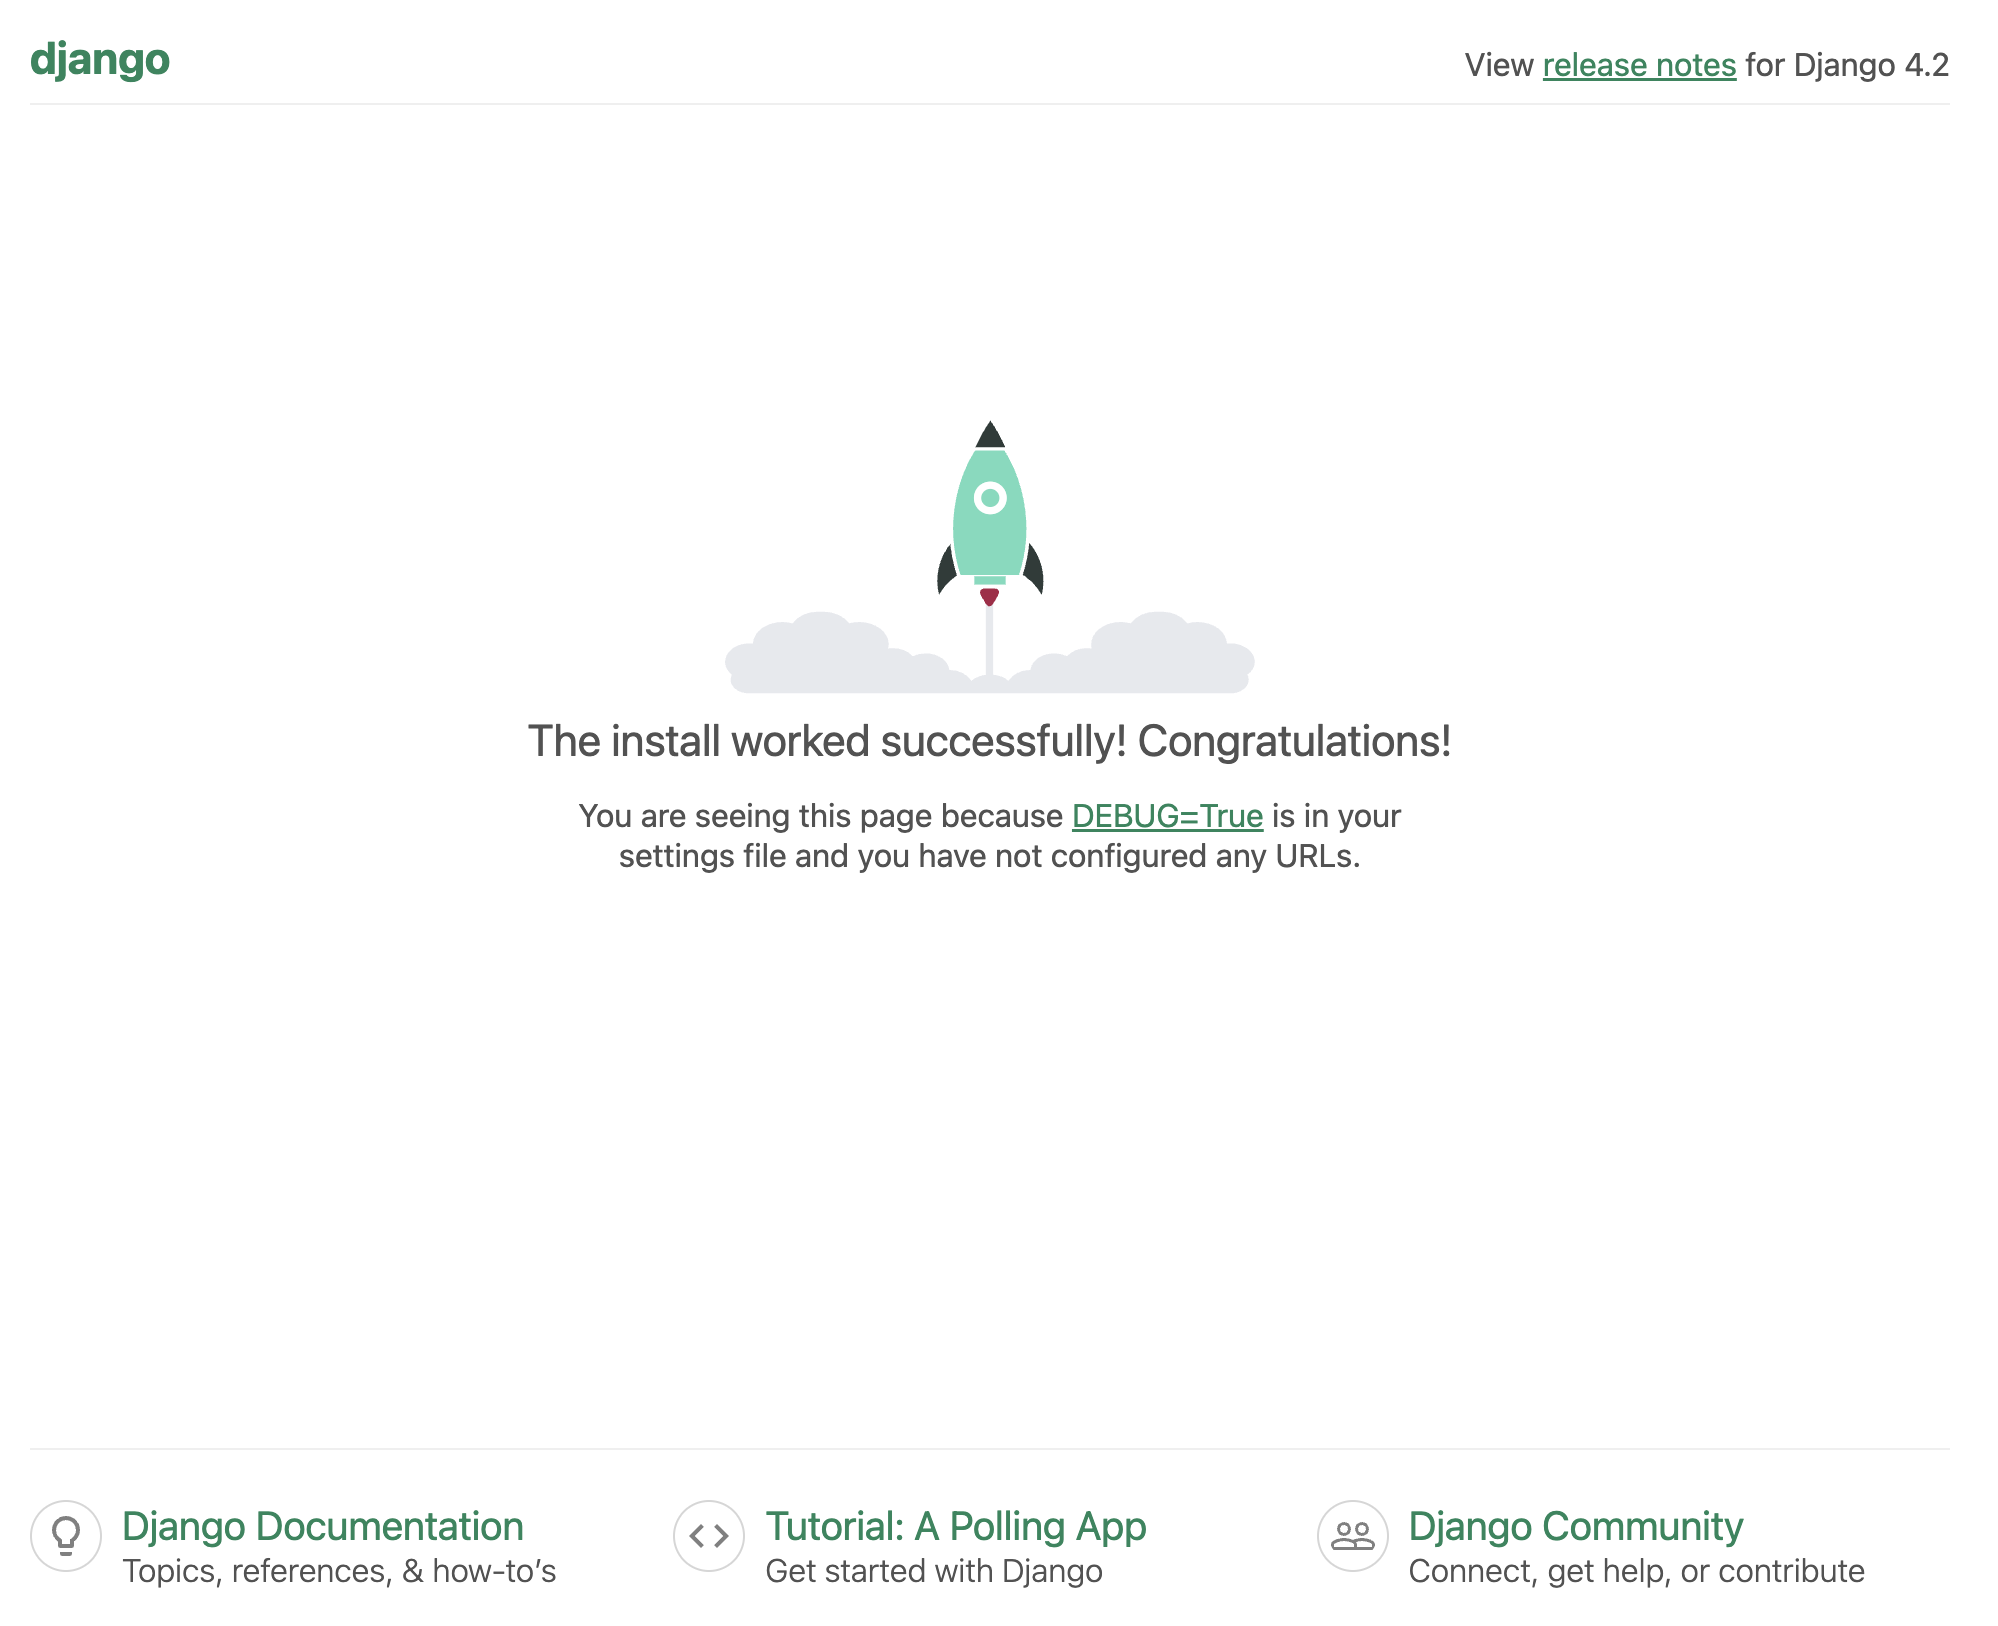
python manage.py runserver. This will start the development server, and you should see output indicating that the server is running. - Open your web browser and enter the URL "http://localhost:8000" or "http://127.0.0.1:8000". You should see a default Django welcome page.
Understanding the Default Django Project
When you create a new Django project, it generates a default project structure with several files and directories. It's important to familiarize yourself with these components.
Firstly, the directory with the same name as the application bookstore which contains the following files
-
Settings File: The
settings.pyfile contains configuration settings for your Django project, such as database connections, installed applications, and middleware settings. -
URL Configuration: The
urls.pyfile defines the URL routing for your project. It maps URL patterns to corresponding views or viewsets. -
Main Application: By default, a Django project contains a single application, also known as the main application. This application serves as the entry point for your project and contains the main URL configuration. There are two files (asgi.py and wsgi.py), each has its own purpose and can both run well.
In addition to another important file manage.py which acts similar to django-admin but this is used more frequently and easily.
Exploring the Django Admin Interface
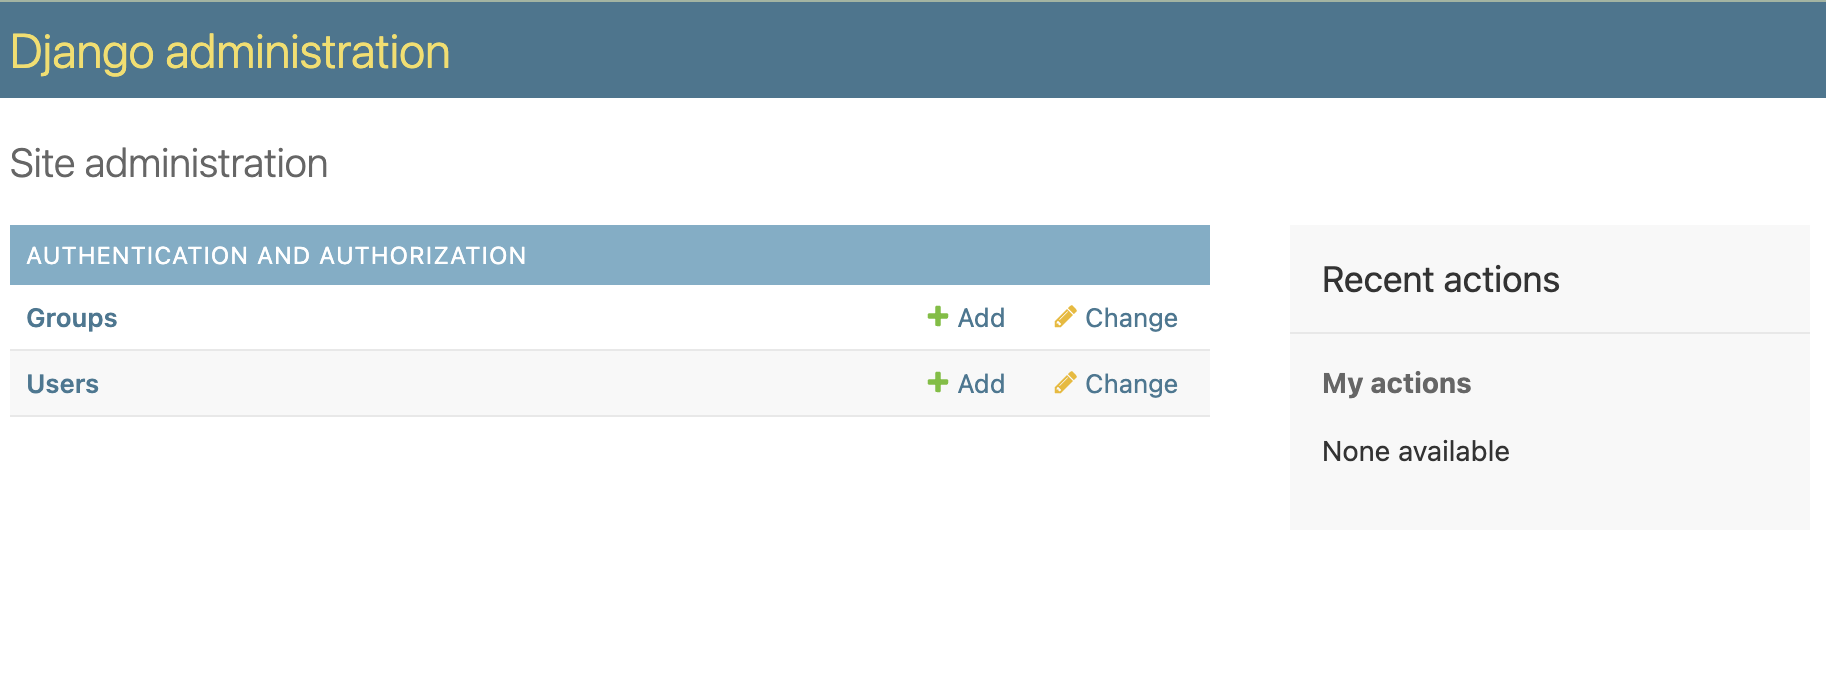
Django provides a powerful built-in administration interface, commonly referred to as the Django admin. This interface allows you to manage your project's data, including creating, updating, and deleting records. Here's how you can explore the Django admin:
- Make sure that the development server is running.
- To create a superuser account, run
python manage.py createsuperuserin your terminal and follow the instructions. - Open your web browser and navigate to the admin URL, usually "http://localhost:8000/admin".
- Use the username and password that you created in the step 2. Once logged in, you can start managing your project's data using the Django admin interface.
Exercises
So we have gone through the steps of building the first Django application, there are few exercises that we should do before moving to the next topic.
- Right now we are using sqlite to manage our database, let use MySQL or PostgreSQL and change the settings.py
- Currently, DEBUG is True which is ok for the development. We should not use DEBUG=True in production. Lets use the package django-environ to separate different environments
- SECRET_KEY is in plan-text too, we should move it to the environment
- Create a sample application inside the Django project, named
store
Congratulations! You have successfully completed Day 1 of learning Django. In the next article, we will dive deeper into Django models and databases, where we'll learn to create models and perform database operations.
Useful Packages
FAQs (Frequently Asked Questions)
-
What is Django? Django is a web framework written in Python that simplifies web application development by providing a robust set of tools and libraries.
-
Why should I use virtual environments? Virtual environments ensure project dependencies remain isolated and prevent conflicts between different projects' packages.
-
Which text editor should I use for Django development? Popular choices for text editors include Visual Studio Code, Sublime Text, and PyCharm, each offering features that enhance productivity.
-
What is the purpose of the Django admin interface? The Django admin interface allows you to manage project data easily, including creating, updating, and deleting records.
-
How can I create a new Django project? You can create a new Django project by using the command
django-admin startproject projectname. -
What is the function of the development server? The development server enables you to run and test your Django project locally before deploying it to a production environment.
-
How do I access the Django admin interface? You can access the Django admin interface by visiting the admin URL in your browser and logging in with a superuser account.