
[TIPS] Tig: A Simple Boost for Your Git Workflow
By ducpm, at: March 25, 2024, 2:58 p.m.
Estimated Reading Time: __READING_TIME__ minutes
![[TIPS] Tig: A Simple Boost for Your Git Workflow](/media/filer_public_thumbnails/filer_public/e9/30/e93042d4-7341-405a-bf56-11993c77f3e2/tips_tig_a_simple_boost_for_your_git_workflow.png__1500x900_q85_crop_subsampling-2_upscale.jpg)
![[TIPS] Tig: A Simple Boost for Your Git Workflow](/media/filer_public_thumbnails/filer_public/e9/30/e93042d4-7341-405a-bf56-11993c77f3e2/tips_tig_a_simple_boost_for_your_git_workflow.png__400x240_q85_crop_subsampling-2_upscale.jpg)
The tig command is a text-mode interface for git, providing an interactive and visual way to navigate and manage git repositories. It simplifies viewing commit history, diffs, and branches, allowing for easier code reviews and repository exploration. Tig supports various modes for different tasks, making it a handy tool for developers working with git.
Install Tig
Ubuntu
To install Tig on Ubuntu, you can utilize the APT package manager. Open a terminal and execute the following command:
sudo apt-get install tig
macOS
For macOS users, Tig can be installed via Homebrew. Open a terminal and run the following command:
brew install tig
Basic Usage
After successful installation, you can initiate Tig by typing tig in the terminal.
As depicted above, Tig appears similar to git log but offers more comprehensive support. Next, you can select any commit or branch. Press enter to select.
Operating Tig is akin to navigating in Vim. Use up and down arrows for the left display and j, k for the right.
In addition to the basic display shown above, below are some fundamental tips for using Tig.
1. Listing Branches and Checking Out Between Them
To view a list of branches and switch between them, utilize the following shortcuts:
-
tig: Open Tig. -
Press
r: View a list of branches.
Here, you can see both local and remote branches displayed with different colors.
-
Press
Shift + c: Checkout to a different branch.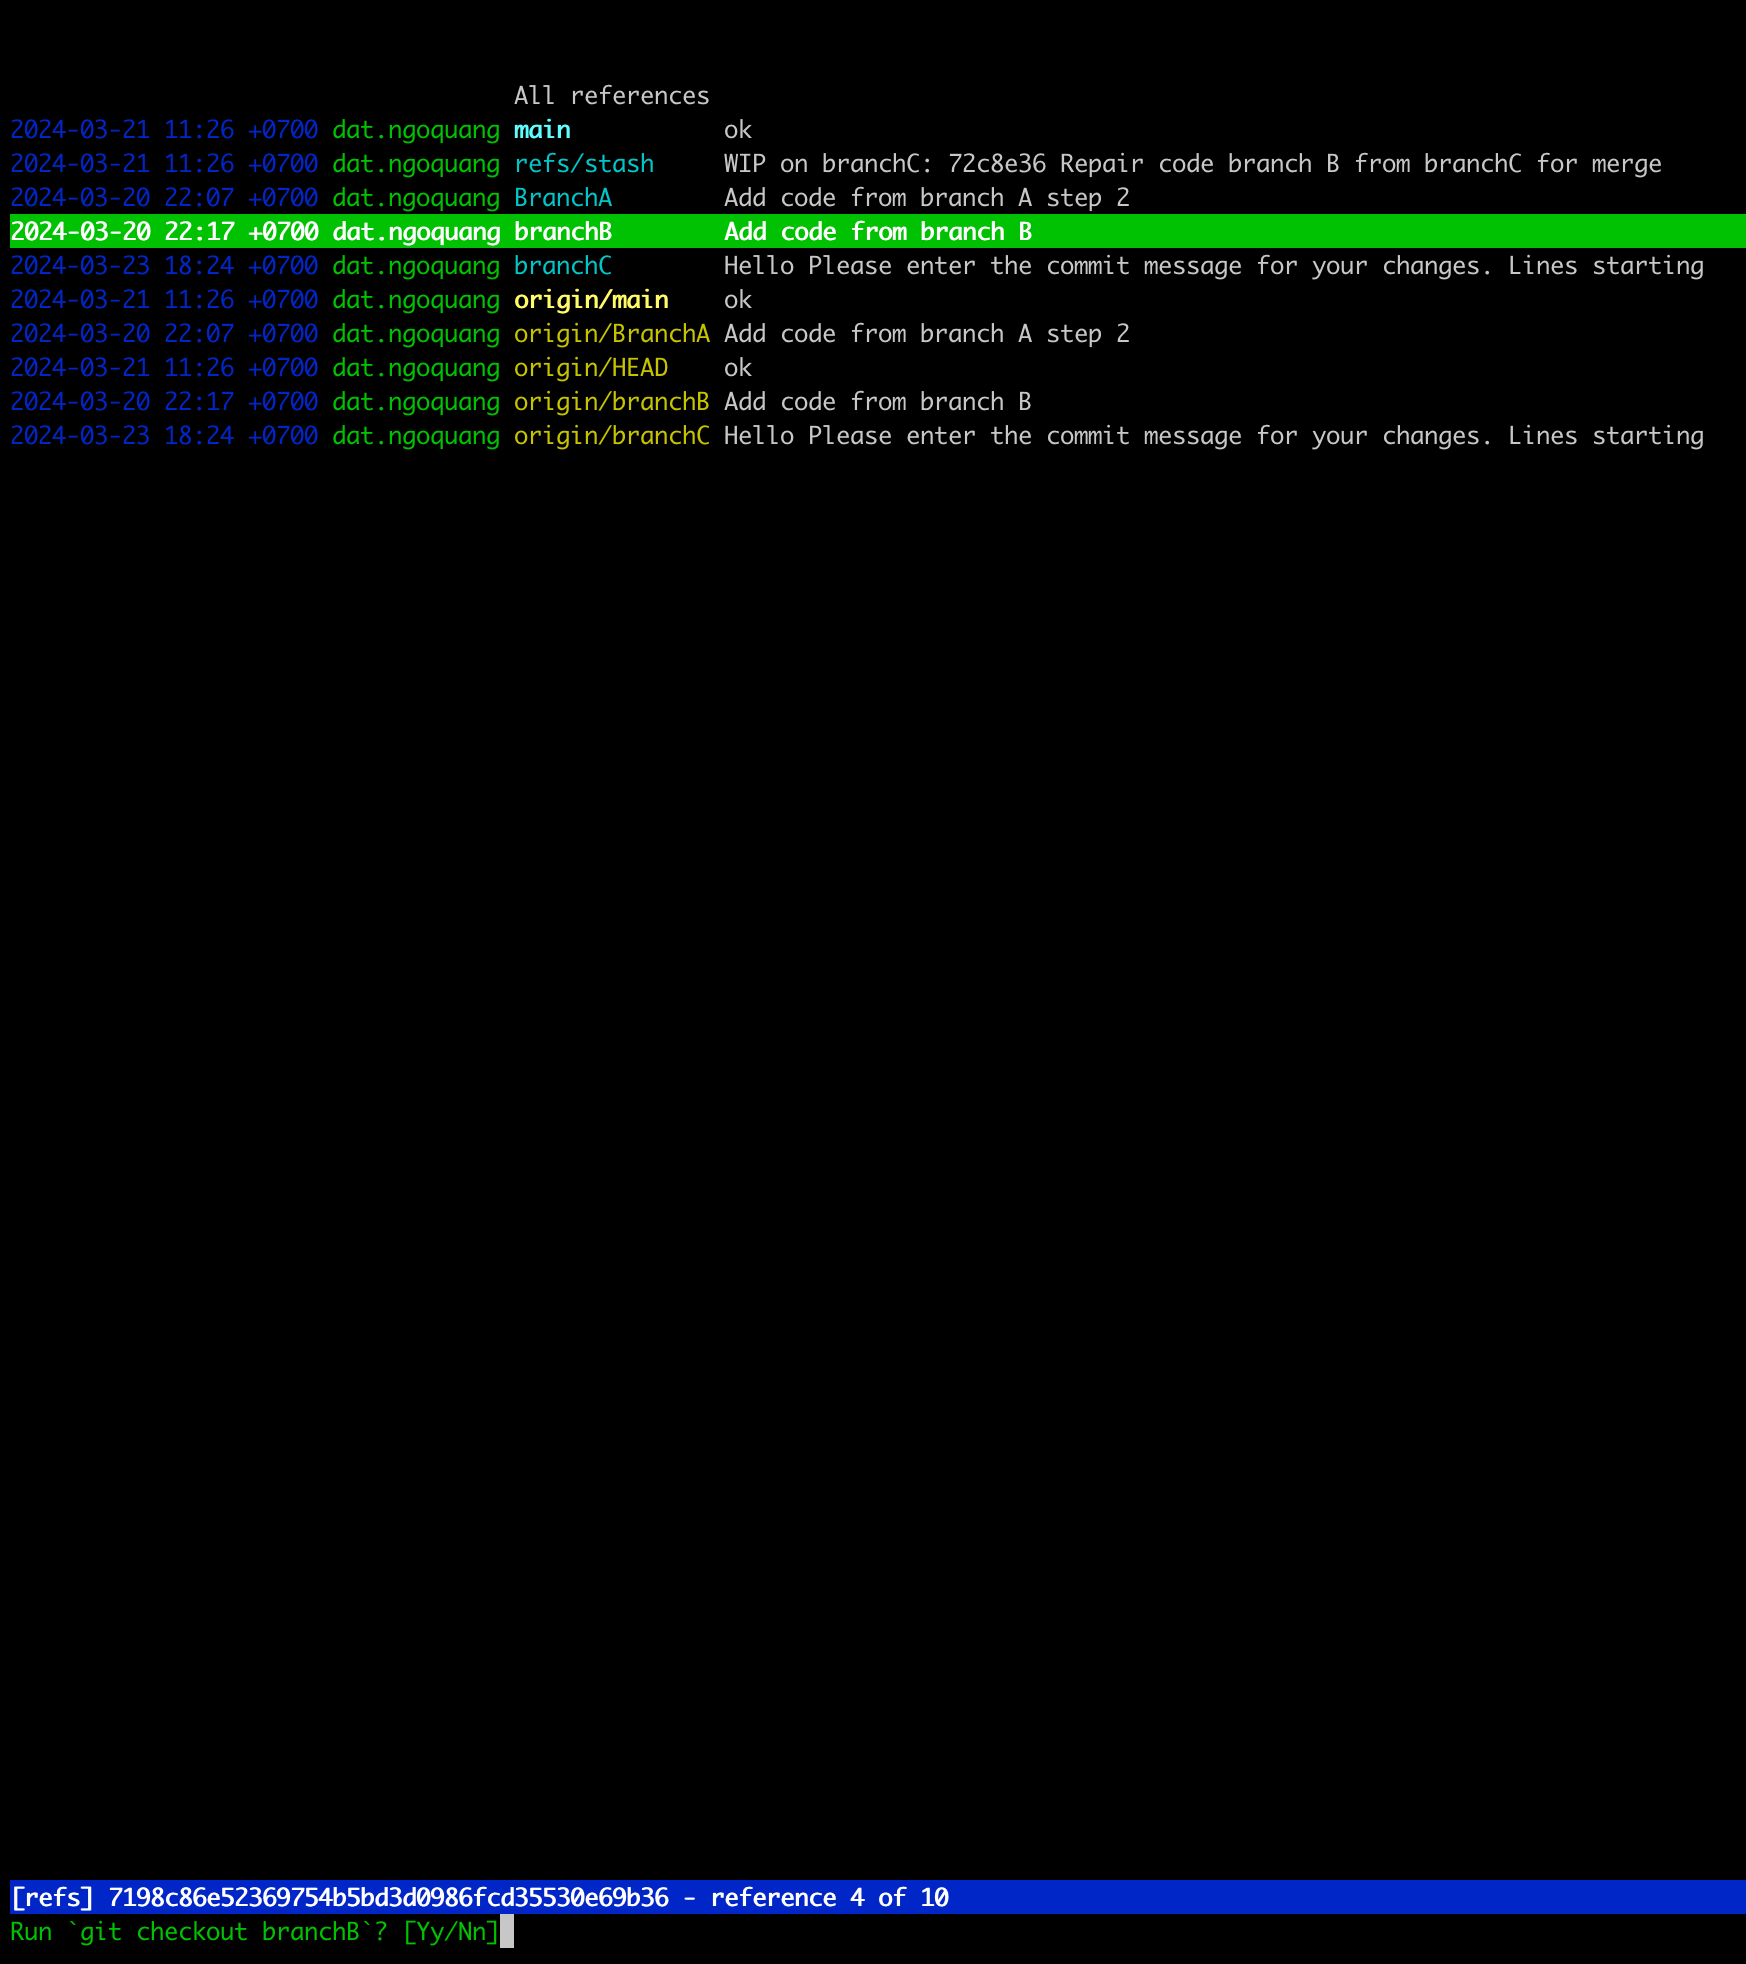
-
Confirm when prompted by entering
y.
2. Adding Files
To stage files for changes, use the following shortcuts:
-
tig: Open Tig. -
Press
Shift + s: Select files to add to the index. -
Press
uto add the selected files. Newly added files will displayA. Modified files will displayMand after staging, they will displayC. Pressinguagain will revert from staged to unstaged.
3. Committing Code
To commit code, follow these steps:
-
tig status: View the status of changes. -
Press
Shift + c: Initiate the commit process -
Enter
:wqto save and exit. -
Use
git pushto push the commits to the repository.
4. Viewing ID of a Commit
To view ID of a commit, follow these steps:
-
tig: Open Tig. -
Type
:toggle idto display commit IDs. -
Select the commit you want to view using arrow keys.
-
Press
Enterto see detailed information.
5. Cherry-Picking
To cherry-pick a commit, follow these steps:
-
tig: Open Tig. -
Select the commit you want to cherry-pick.
-
Press
Shift + cto initiate cherry-picking. -
Confirm when prompted by entering
y.
Other Useful Commands:
Tig blame< file >:This command is particularly useful for investigating the history of changes made to a specific file within the repository. It provides detailed insights into who made each change, when the change was made, and the corresponding commit information.
Tig< branch1 > ... < branch2 >:This command enables users to compare code differences between different branches within the repository. By specifying the branches to compare, users can easily identify variations in code between the selected branches.
Tig stash:The stash command in Tig is essential for managing changes in a Git repository. It allows users to temporarily store modifications that are not yet ready to be committed. By stashing changes, users can maintain a clean working directory without losing any work in progress.
References:
- Tig documentation: https://jonas.github.io/tig/
- blog posts I referenced:
- Git documentation: https://www.atlassian.com/git/tutorials/comparing-workflows/gitflow-workflow

![[TIPS] Salesforce REST API: The requested resource does not exist](/media/filer_public_thumbnails/filer_public/31/a1/31a194f5-b579-415d-bc7b-1af0f602733d/salesforce_rest_api_errors.png__400x240_q85_crop_subsampling-2_upscale.jpg)
![[TIPS] Download Youtube videos with Python](/media/filer_public_thumbnails/filer_public/46/29/46297163-bf40-4d2c-8dde-e2d52da6ed6a/youtube_downloader.png__400x240_q85_crop_subsampling-2_upscale.jpg)

