Secure and Efficient Authentication with FastAPI: Integrating JWT for Web Applications

By khoanc, at: 18:30 Ngày 04 tháng 6 năm 2023

Thời gian đọc ước tính: 20 min read

Secure and Efficient Authentication with FastAPI: Integrating JWT for Web Applications

Add JWT Token to FastAPI


Introduction

Authentication, which ensures only authorized users can access certain resources or perform specific actions, is a critical aspect of web application development. JSON Web Tokens (JWT) have become a popular choice for implementing authentication mechanisms due to its flexibility and security. In this article, we will explore how to add JWT token-based authentication to a FastAPI application.

Beside, FastAPI, a modern + fast Python web framework, offers a robust and efficient platform for web development. By JWT tokens and FastAPI integration, we can enhance the security and authentication capabilities of our applications.

In this guide, we will walk through a complete process of setting up a FastAPI application and adding JWT token authentication step by step.

Table of Contents

Overview of FastAPI

FastAPI is a modern and high-performance Python web framework specifically designed for building APIs. Leveraging the power of asynchronous programming through ASGI (Asynchronous Server Gateway Interface), this framework delivers exceptional performance and scalability.


Key Features:

  • High Performance: The ability to handle a large number of concurrent requests with minimal overhead, high throughput and low latency.
  • Modern Python Syntax: With support for Python 3.7+ type hints, this provides automatic data validation, serialization, and documentation generation.
  • Easy Integration: It is convenient to work with databases, authentication systems, and third-party packages thanks to a variety of Python libraries.
  • Built-in Documentation Generation: The automatically generated API documentation based on standardized OpenAPI and JSON Schema specifications is a built-in.
  • Type Safety and Editor Support: The type hints enables early error detection and offers enhanced autocompletion and code analysis features in modern editors.
  • Security and Authentication Support: FastAPI provides various authentication mechanisms, including support for JWT, OAuth, and other authentication methods.

FastAPI has gained popularity among developers due to its performance, modern syntax, easy integration, automatic documentation generation, type safety, and security features. 


Introduction to JWT

JWT (JSON Web Token) is a compact and self-contained token format that is widely used for authentication and authorization in web applications. It consists of three parts: a header, a payload, and a signature, which are base64url encoded and separated by dots.

Key Features:

  • Compactness: Lightweight and can be easily transmitted over networks and stored in cookies or local storage.
  • Self-contained: The token contains all the necessary information, eliminating the need for server-side storage or database lookups.
  • Statelessness: Since the token carries all the necessary data, it enables stateless authentication, allowing servers to scale horizontally.
  • Versatility: This token can be used for various purposes beyond authentication, such as sharing claims or providing authorization information.

Pros:

  • Security: JWTs can be digitally signed using secret keys or public/private key pairs, ensuring data integrity and preventing tampering.
  • Decentralized: JWTs enable authentication without relying on centralized session stores, making them suitable for microservices and distributed systems.
  • Easy Integration: JWTs are widely supported by frameworks and libraries, making it straightforward to implement JWT-based authentication.

Cons:

  • Token Size: Since JWTs carry information within the token itself, they can be larger in size compared to other authentication mechanisms.
  • Revocation Challenges: Revoking a JWT before its expiration requires additional considerations and mechanisms, as the token itself is stateless.
  • Sensitive Data: JWTs should not contain sensitive information, as they can be decoded by anyone who has access to the token.

JWT provides a flexible and secure approach to authentication in web applications. In the upcoming sections, we will explore how to integrate JWT token-based authentication into FastAPI, harnessing its benefits for secure and scalable authentication mechanisms.
 

Setting up a FastAPI Application

To get started, we need to set up a basic FastAPI application. Follow the steps below to create a simple application for warehouse management.

Step 1: Install FastAPI and Uvicorn

pip install fastapi uvicorn


Step 2: Create a new Python file, e.g., main.py, and open it in your preferred code editor.


Step 3: Import the necessary modules and classes from FastAPI and Uvicorn.

from fastapi import FastAPI
import uvicorn


Step 4: Create an instance of the FastAPI class to represent our FastAPI application.

app = FastAPI()


Step 5: Define the root route and its corresponding route handler. In this example, we will return a simple welcome message.

@app.get("/welcome")
def welcome():
    return {"message": "Welcome to the Warehouse Management API"}


Step 6: (Optional) Define additional routes and their respective route handlers to implement the functionality for your warehouse management application.


Step 7: Add the following conditional block at the end of the file to run the FastAPI application using Uvicorn.

if __name__ == "__main__":
    uvicorn.run(app, host="0.0.0.0", port=8000)


Step 8: Save the file and navigate to the terminal or command prompt. Change the directory to where your main.py file is located.

The main.py file content will look like this

from fastapi import FastAPI
import uvicorn

app = FastAPI()

@app.get("/welcome")
def welcome():
    return {"message": "Welcome to the Warehouse Management API"}

if __name__ == "__main__":
    uvicorn.run(app, host="0.0.0.0", port=8000)


Step 9: Start the FastAPI application

uvicorn main:app --reload


Congratulations! You have successfully set up a basic FastAPI application for warehouse management. You can now access the root route at http://localhost:8000/wecome and see the welcome message.

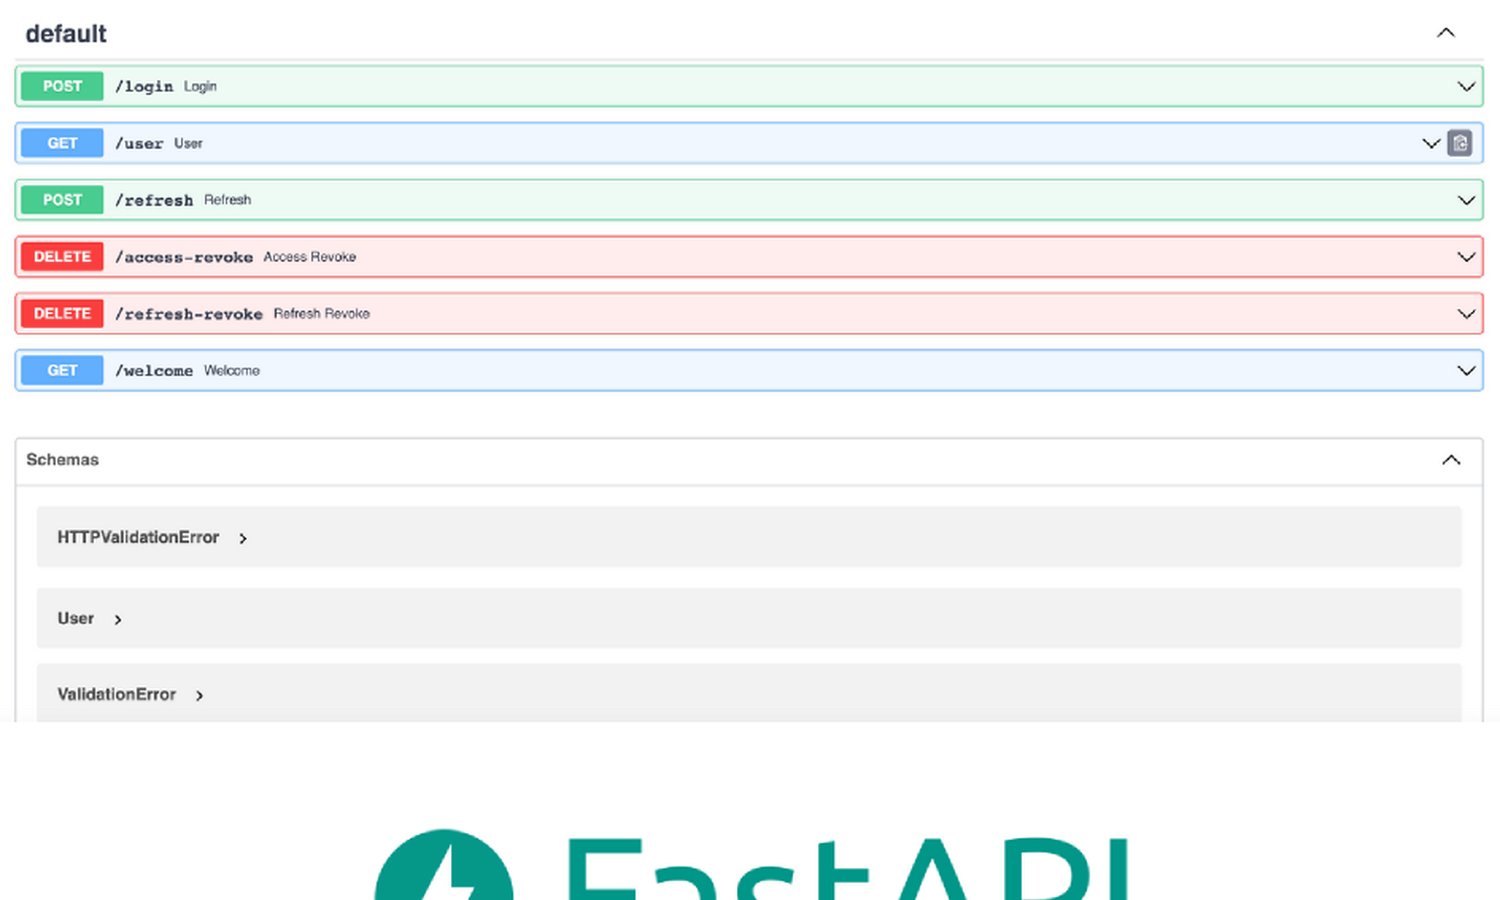
Or we can open http://localhost:8000/docs to see the API document


Adding JWT Authentication library

To add JWT token-based authentication to our FastAPI application, we need to create middleware that verifies and decodes the JWT token from the incoming requests. Let's implement the JWT authentication middleware using the fastapi-jwt-auth library.

Install required packages

pip install pydantic  # models
pip install fastapi-jwt-auth  # jwt token


Add User model

from pydantic import BaseModel

class User(BaseModel):
    username: str
    password: str


Add JWT class and function handlers

# in production you can use Settings management
# from pydantic to get secret key from .env
class Settings(BaseModel):
    authjwt_secret_key: str = "secret"

# callback to get your configuration
@AuthJWT.load_config
def get_config():
    return Settings()

# exception handler for authjwt
# in production, you can tweak performance using orjson response
@app.exception_handler(AuthJWTException)
def authjwt_exception_handler(request: Request, exc: AuthJWTException):
    return JSONResponse(
        status_code=exc.status_code,
        content={"detail": exc.message}
    )


Define route

# provide a method to create access tokens. The create_access_token()
# function is used to actually generate the token to use authorization
# later in endpoint protected
@app.post('/login')
def login(user: User, Authorize: AuthJWT = Depends()):
    if user.username != "joevu" or user.password != "glinteco":
        raise HTTPException(status_code=401,detail="Bad username or password")

    # subject identifier for who this token is for example id or username from database
    access_token = Authorize.create_access_token(subject=user.username)
    return {"access_token": access_token}

# protect endpoint with function jwt_required(), which requires
# a valid access token in the request headers to access.
@app.get('/user')
def user(Authorize: AuthJWT = Depends()):
    Authorize.jwt_required()

    current_user = Authorize.get_jwt_subject()
    return {"user": current_user}


The final main.py file will look like

from fastapi import FastAPI, HTTPException, Depends, Request
from fastapi.responses import JSONResponse
from fastapi_jwt_auth import AuthJWT
from fastapi_jwt_auth.exceptions import AuthJWTException
from pydantic import BaseModel

app = FastAPI()

class User(BaseModel):
    username: str
    password: str

# in production you can use Settings management
# from pydantic to get secret key from .env
class Settings(BaseModel):
    authjwt_secret_key: str = "secret"

# callback to get your configuration
@AuthJWT.load_config
def get_config():
    return Settings()

# exception handler for authjwt
# in production, you can tweak performance using orjson response
@app.exception_handler(AuthJWTException)
def authjwt_exception_handler(request: Request, exc: AuthJWTException):
    return JSONResponse(
        status_code=exc.status_code,
        content={"detail": exc.message}
    )

# provide a method to create access tokens. The create_access_token()
# function is used to actually generate the token to use authorization
# later in endpoint protected
@app.post('/login')
def login(user: User, Authorize: AuthJWT = Depends()):
    if user.username != "joevu" or user.password != "glinteco":
        raise HTTPException(status_code=401,detail="Bad username or password")

    # subject identifier for who this token is for example id or username from database
    access_token = Authorize.create_access_token(subject=user.username)
    return {"access_token": access_token}

# protect endpoint with function jwt_required(), which requires
# a valid access token in the request headers to access.
@app.get('/user')
def user(Authorize: AuthJWT = Depends()):
    Authorize.jwt_required()

    current_user = Authorize.get_jwt_subject()
    return {"user": current_user}

@app.get("/welcome")
def welcome():
    return {"message": "Welcome to the Warehouse Management API"}

if __name__ == "__main__":
    uvicorn.run(app, host="0.0.0.0", port=8000)


Open http://localhost:8000/docs to see the new APIs


Refreshing JWT Token

In a JWT-based authentication system, tokens have an expiration time to ensure security. Once a token expires, the user needs to reauthenticate to obtain a new token. However, there are scenarios where we might want to extend the validity of the token without requiring the user to reauthenticate. This is where token refreshing comes into play.

Add refresh token to the login api

refresh_token = Authorize.create_refresh_token(subject=user.username)


Add refresh token api

@app.post('/refresh')
def refresh(Authorize: AuthJWT = Depends()):
    """
    The jwt_refresh_token_required() function insures a valid refresh
    token is present in the request before running any code below that function.
    we can use the get_jwt_subject() function to get the subject of the refresh
    token, and use the create_access_token() function again to make a new access token
    """
    Authorize.jwt_refresh_token_required()

    current_user = Authorize.get_jwt_subject()
    new_access_token = Authorize.create_access_token(subject=current_user)
    return {"access_token": new_access_token}


the final main.py content is

from fastapi import FastAPI, HTTPException, Depends, Request
from fastapi.responses import JSONResponse
from fastapi_jwt_auth import AuthJWT
from fastapi_jwt_auth.exceptions import AuthJWTException
from pydantic import BaseModel

app = FastAPI()

class User(BaseModel):
    username: str
    password: str

# in production you can use Settings management
# from pydantic to get secret key from .env
class Settings(BaseModel):
    authjwt_secret_key: str = "secret"

# callback to get your configuration
@AuthJWT.load_config
def get_config():
    return Settings()

# exception handler for authjwt
# in production, you can tweak performance using orjson response
@app.exception_handler(AuthJWTException)
def authjwt_exception_handler(request: Request, exc: AuthJWTException):
    return JSONResponse(
        status_code=exc.status_code,
        content={"detail": exc.message}
    )

# provide a method to create access tokens. The create_access_token()
# function is used to actually generate the token to use authorization
# later in endpoint protected
@app.post('/login')
def login(user: User, Authorize: AuthJWT = Depends()):
    if user.username != "joevu" or user.password != "glinteco":
        raise HTTPException(status_code=401,detail="Bad username or password")

    # subject identifier for who this token is for example id or username from database
    access_token = Authorize.create_access_token(subject=user.username)
    refresh_token = Authorize.create_refresh_token(subject=user.username)
    return {"access_token": access_token}

# protect endpoint with function jwt_required(), which requires
# a valid access token in the request headers to access.
@app.get('/user')
def user(Authorize: AuthJWT = Depends()):
    Authorize.jwt_required()

    current_user = Authorize.get_jwt_subject()
    return {"user": current_user}

@app.post('/refresh')
def refresh(Authorize: AuthJWT = Depends()):
    """
    The jwt_refresh_token_required() function insures a valid refresh
    token is present in the request before running any code below that function.
    we can use the get_jwt_subject() function to get the subject of the refresh
    token, and use the create_access_token() function again to make a new access token
    """
    Authorize.jwt_refresh_token_required()

    current_user = Authorize.get_jwt_subject()
    new_access_token = Authorize.create_access_token(subject=current_user)
    return {"access_token": new_access_token}

@app.get("/welcome")
def welcome():
    return {"message": "Welcome to the Warehouse Management API"}

if __name__ == "__main__":
    uvicorn.run(app, host="0.0.0.0", port=8000)


Testing JWT Authentication

We can test the JWT auth by using terminal

$ curl http://localhost:8000/user
{"detail":"Missing Authorization Header"}

$ curl -H "Content-Type: application/json" -X POST \
  -d '{"username":"joevu","password":"glinteco"}' http://localhost:8000/login
{"access_token":"eyJ0eXAiOiJKV1QiLCJhbGciOiJIUzI1NiJ9.eyJzdWIiOiJqb2V2dSIsImlhdCI6MTY4NTgwMDYzNywibmJmIjoxNjg1ODAwNjM3LCJqdGkiOiI5YTExZDgxNy1jNGZkLTQ0NjYtOWMzOC1kYjE0OTBlNTA4NDEiLCJleHAiOjE2ODU4MDE1MzcsInR5cGUiOiJhY2Nlc3MiLCJmcmVzaCI6ZmFsc2V9.JvVTzgLck-rJJ-vmzKfjh4pPD6ZunUHPdT84HjnvRt0"}%

$ export TOKEN=eyJ0eXAiOiJKV1QiLCJhbGciOiJIUzI1NiJ9.eyJzdWIiOiJqb2V2dSIsImlhdCI6MTY4NTgwMDYzNywibmJmIjoxNjg1ODAwNjM3LCJqdGkiOiI5YTExZDgxNy1jNGZkLTQ0NjYtOWMzOC1kYjE0OTBlNTA4NDEiLCJleHAiOjE2ODU4MDE1MzcsInR5cGUiOiJhY2Nlc3MiLCJmcmVzaCI6ZmFsc2V9.JvVTzgLck-rJJ-vmzKfjh4pPD6ZunUHPdT84HjnvRt0

$ curl -H "Authorization: Bearer $TOKEN" http://localhost:8000/user
{"user":"joevu"}


or using the web browser http://localhost:8000/docs


Handling JWT revocation


Updat Settings class

authjwt_denylist_enabled: bool = True
authjwt_denylist_token_checks: set = {"access","refresh"}


Initialize denylist for revoked tokens

denylist = set()


Add function to check if the token is in the denylist

@AuthJWT.token_in_denylist_loader
def check_if_token_in_denylist(decrypted_token):
    jti = decrypted_token['jti']
    return jti in denylist


Add test apis for access revoke and refresh revoke

# Endpoint for revoking the current users access token
@app.delete('/access-revoke')
def access_revoke(Authorize: AuthJWT = Depends()):
    Authorize.jwt_required()

    jti = Authorize.get_raw_jwt()['jti']
    denylist.add(jti)
    return {"detail":"Access token has been revoke"}

# Endpoint for revoking the current users refresh token
@app.delete('/refresh-revoke')
def refresh_revoke(Authorize: AuthJWT = Depends()):
    Authorize.jwt_refresh_token_required()

    jti = Authorize.get_raw_jwt()['jti']
    denylist.add(jti)
    return {"detail":"Refresh token has been revoke"}


Then the full content of  main.py is

from fastapi import FastAPI, HTTPException, Depends, Request
from fastapi.responses import JSONResponse
from fastapi_jwt_auth import AuthJWT
from fastapi_jwt_auth.exceptions import AuthJWTException
from pydantic import BaseModel

app = FastAPI()

denylist = set()

class User(BaseModel):
    username: str
    password: str

# in production you can use Settings management
# from pydantic to get secret key from .env
class Settings(BaseModel):
    authjwt_secret_key: str = "secret"
    authjwt_denylist_enabled: bool = True
    authjwt_denylist_token_checks: set = {"access","refresh"}

# callback to get your configuration
@AuthJWT.load_config
def get_config():
    return Settings()

@AuthJWT.token_in_denylist_loader
def check_if_token_in_denylist(decrypted_token):
    jti = decrypted_token['jti']
    return jti in denylist

# exception handler for authjwt
# in production, you can tweak performance using orjson response
@app.exception_handler(AuthJWTException)
def authjwt_exception_handler(request: Request, exc: AuthJWTException):
    return JSONResponse(
        status_code=exc.status_code,
        content={"detail": exc.message}
    )

# provide a method to create access tokens. The create_access_token()
# function is used to actually generate the token to use authorization
# later in endpoint protected
@app.post('/login')
def login(user: User, Authorize: AuthJWT = Depends()):
    if user.username != "joevu" or user.password != "glinteco":
        raise HTTPException(status_code=401,detail="Bad username or password")

    # subject identifier for who this token is for example id or username from database
    access_token = Authorize.create_access_token(subject=user.username)
    refresh_token = Authorize.create_refresh_token(subject=user.username)
    return {"access_token": access_token}

# protect endpoint with function jwt_required(), which requires
# a valid access token in the request headers to access.
@app.get('/user')
def user(Authorize: AuthJWT = Depends()):
    Authorize.jwt_required()

    current_user = Authorize.get_jwt_subject()
    return {"user": current_user}

@app.post('/refresh')
def refresh(Authorize: AuthJWT = Depends()):
    """
    The jwt_refresh_token_required() function insures a valid refresh
    token is present in the request before running any code below that function.
    we can use the get_jwt_subject() function to get the subject of the refresh
    token, and use the create_access_token() function again to make a new access token
    """
    Authorize.jwt_refresh_token_required()

    current_user = Authorize.get_jwt_subject()
    new_access_token = Authorize.create_access_token(subject=current_user)
    return {"access_token": new_access_token}

# Endpoint for revoking the current users access token
@app.delete('/access-revoke')
def access_revoke(Authorize: AuthJWT = Depends()):
    Authorize.jwt_required()

    jti = Authorize.get_raw_jwt()['jti']
    denylist.add(jti)
    return {"detail":"Access token has been revoke"}

# Endpoint for revoking the current users refresh token
@app.delete('/refresh-revoke')
def refresh_revoke(Authorize: AuthJWT = Depends()):
    Authorize.jwt_refresh_token_required()

    jti = Authorize.get_raw_jwt()['jti']
    denylist.add(jti)
    return {"detail":"Refresh token has been revoke"}

@app.get("/welcome")
def welcome():
    return {"message": "Welcome to the Warehouse Management API"}

if __name__ == "__main__":
    uvicorn.run(app, host="0.0.0.0", port=8000)


Conclusion

In this article, we explored the integration of JWT authentication with FastAPI for building secure web applications. We covered various aspects, including setting up a FastAPI application, adding JWT authentication using the FastAPI JWT Auth library, refreshing JWT tokens, revoking JWT tokens

Remember to handle JWT tokens securely by using strong secret keys, implementing token refreshing to extend session validity, and properly managing token revocation to invalidate tokens if needed.

By understanding and implementing JWT authentication in FastAPI, you can ensure that your web applications have secure and efficient authentication mechanisms, providing a seamless and protected experience for your users.

FAQs


Q1: Can I use other authentication mechanisms alongside JWT in FastAPI?

Yes, FastAPI supports various authentication mechanisms, and you can combine JWT authentication with other methods like OAuth2, session-based authentication, or custom authentication schemes based on your application's requirements.


Q2: How can I handle token revocation in a JWT-based authentication system?

Token revocation can be handled by maintaining a blacklist or revocation list on the server-side. When a token needs to be revoked, you can add its identifier (e.g., token ID or user ID) to the revocation list. Before processing incoming requests with JWT tokens, you can check if the token is present in the revocation list to ensure it has not been revoked.


Q3: Are there any security considerations when using JWT authentication?

Yes, there are some important security considerations to keep in mind when using JWT authentication. These include using strong secret keys, validating the token's signature and claims, securely transmitting tokens over HTTPS, and implementing proper token expiration and revocation strategies.


Q4: Can I customize the claims (payload) in the JWT token?

Yes, you can include custom claims in the JWT token's payload. Claims can hold additional information about the user, such as roles, permissions, or any other relevant data. However, ensure that sensitive information is not stored in the token's payload to maintain security.


Q5: Can I implement token-based authentication in FastAPI without using JWT?

Yes, FastAPI supports various authentication methods, and you can implement token-based authentication using other token formats like OAuth2 tokens or session-based authentication. JWT is a popular choice due to its simplicity and self-contained nature, but you have the flexibility to choose the authentication mechanism that best fits your application's requirements.


References


Theo dõi

Theo dõi bản tin của chúng tôi và không bao giờ bỏ lỡ những tin tức mới nhất.